How to create and run a pickup game through OpenSports: Complete App Guide
Note: Many screenshots in this guide are outdated
This short guide contains the following sections:
- Creating an event
- Collecting money and getting paid
- Inviting players to your event
- Creating teams in advance
- How do players join your event
- How to check-in players
- Sending refunds
- Repeating events/Recurring events
- Additional features (memberships, discounts, event filters, etc).
1. Creating an Event (App and Web)
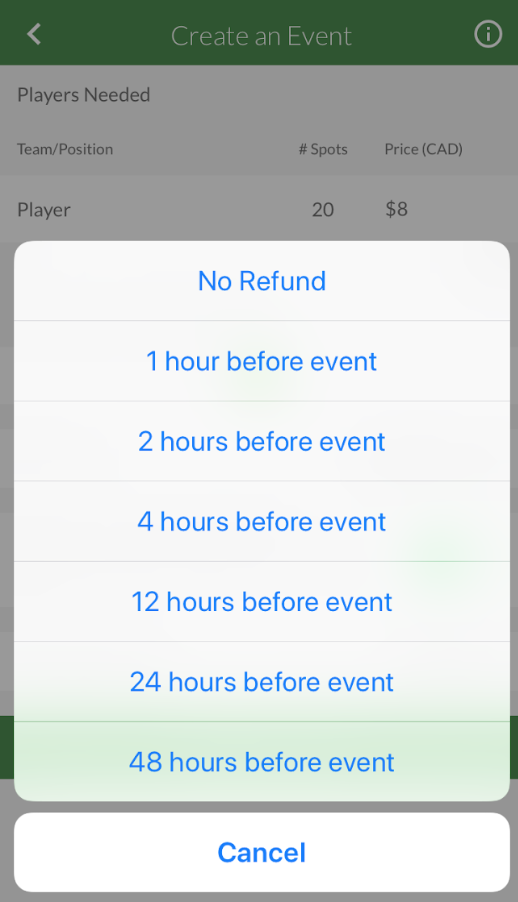
Click on Create Event > Select which sport you are organizing > Fill in all of the details in the Create an Event form (title, details, date and time, location, skill level, gender, number of players needed, if players are allowed to bring guests) > Select if you are Collecting Payment via OpenSports (more about collecting payment below) > Select a Refund Deadline (more about refund deadlines below).
Note: you can also create an event on the website, here.


2. Collecting Money and Getting Paid
The process is very similar on the App and on Web!
Note: By this point, you should already have a group on OpenSports, and you should have already connected your organizations’ bank account (or personal bank account) to Stripe Connect for automatic Deposits. More about connecting your bank account here.
- When you are in the “Create an Event” screen, input a price, or prices if you open up different spots.

2. The option to “Collect Payment via OpenSports” will automatically toggle ON.

Accepted Cards (in addition to Google Pay & Apple Pay)
USA: Players can pay with all major Debit or Credit Cards including Visa, MasterCard, American Express, Discover, JCB, Diners Club, UnionPay.
All other countries: Players can pay with Visa (and Visa Debit), MasterCard, American Express (Debit not accepted at the moment).
Payouts/Obtaining funds after your event:
Groups in Australia, Canada, Europe, Hong Kong, Singapore: 7-day rolling bank transfers
Groups in Australia & United States: 2-day rolling bank transfers
Groups in New Zealand: 4-day rolling bank transfers
Groups in Japan: weekly payments
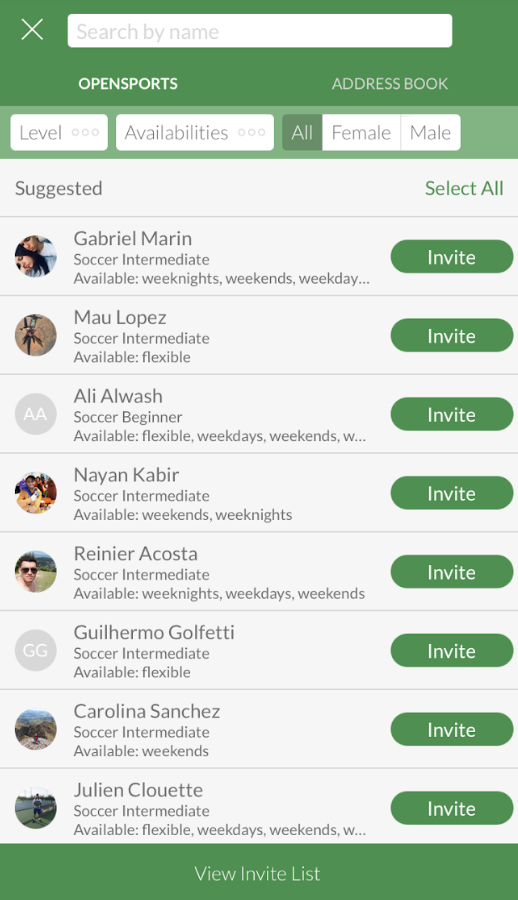
3. Inviting Players to Your Event
Once your finished creating your event, you will automatically be prompted to invite players. The auto-generated list of suggested people to invite is ALREADY filtered by sport or activity, and location. This means if you created a soccer game, the “suggested invites list” will automatically populate with local soccer players!
You can always go back to your event, click “Invite” and invite more players.
Invite Filters
At the top of the invites screen are tabs that allow you to select which category of people you want to invite from: Your Group; OpenSports Users; and Phone Contacts. Within those categories, you can filter your invites by Gender (male/female/co-ed), Availability (mornings, weekdays, weeknights, weekends), and Skill Level.
Note: You can only send invites to up to 50 players per day. If you want permission to increase that limit, contact us to talk about that!
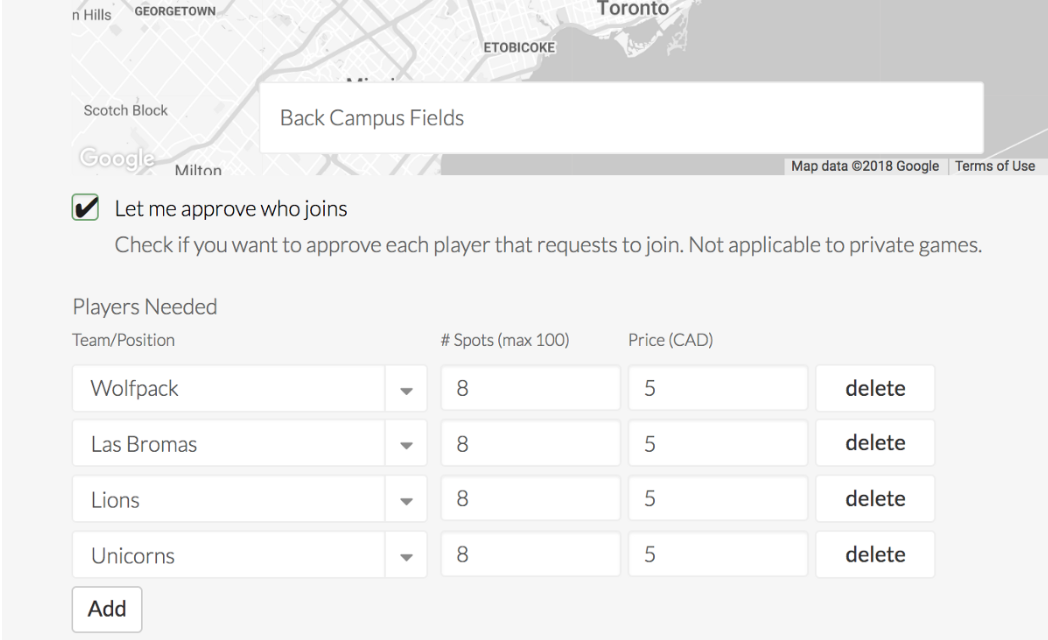
4. Creating Teams in Advance
When you creating an event, scroll down to the box that says ‘Players Needed’.
You can start entering the details for your first team by typing in the different boxes. For example, under Team/Position you could specify the team jersey colour or team name. Then continue this for the number of spots available on your first team and the price per member of that team.
5. How do Players Join?
If you invite OpenSports users, they will receive a push notification letting them know that you invited them to your event, and they will be able to instantly join (and pay, if it’s a paid game).
Players do not need the OpenSports app to join events and receive invites, but they do need an OpenSports account.
If you sent invites to phone contacts (people who are not OpenSports members) they don’t need to download the OpenSports app to join and pay for your events, but they do need to at least log-in on the website in order join your group and receive invites to your events.
In one click through Facebook, anybody can create an account. If they don’t have Facebook, we require they verify their email address before they join an event.
6. How to Check-in Players
- Go to your event (on web or app)
- Click on your attendees list
- Click on “Check-in” for the players that are at your event
- You can go back and modify your check-in list at any time!
Note: You have to have the Check-in permission in order to check-in attendees. If you are a Group Admin, or the Event Admin or Event Manager for a Group, you’ll be able to check-in attendees for events within the group. You will also be able to see who checked the attendee in (i.e., If you have co-organizers).
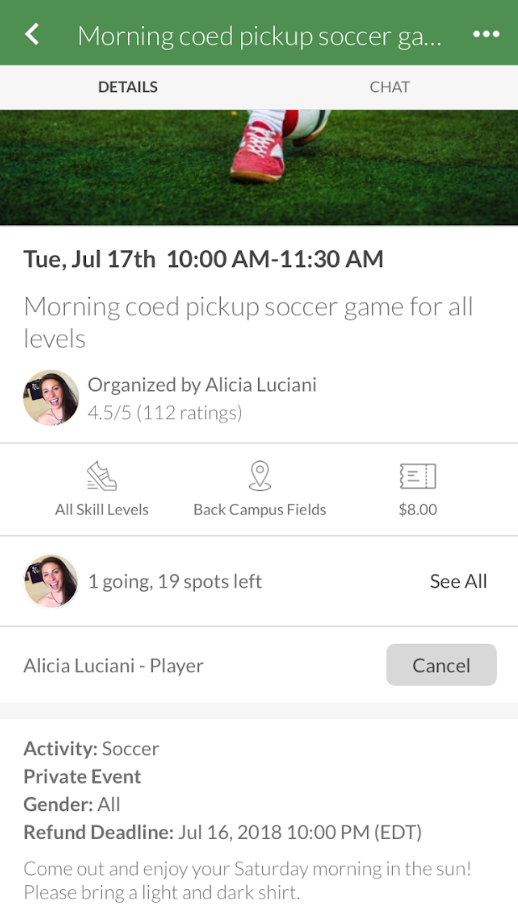
7. Sending Refunds
If you selected a refund deadline, players who cancel by the deadline will automatically be refunded. If you would like to manually refund a player, follow the steps below.
Manual Refunds
Tap on “Manage Users” > Under the Attending list, swipe from left to right on the name of the player you want to refund > Click “Refund Order”. That’s it!
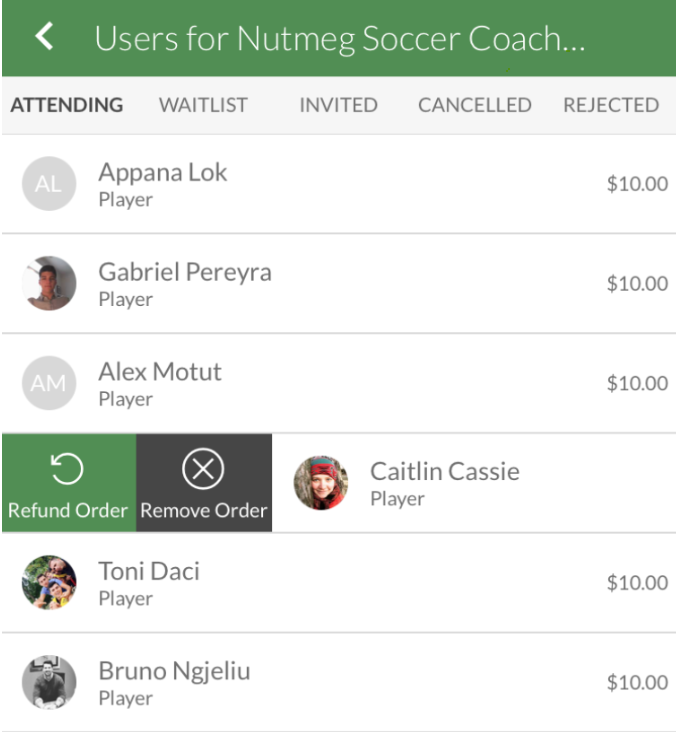
The player will receive a message in their OpenSports chat (or email, if they are set up to receive notifications via email), letting them know that they will receive a refund in next few days.
8. Repeating an event
You can use our recurring events tool or our repeat events tool! Here’s our guide to setting up recurring pickup/drop-in/open play events.
9. Additional features
1️⃣ You can set up custom Covid health checks/screening questions to automatically go out to players before events 2️⃣ User Dashboard — easily find registration info for members of your group, to seamlessly pull up their invoices, send refunds, view their memberships, etc. 3️⃣ Custom Questions — collect custom info when players sign up for your events by asking questions like “What’s your email address? Phone #? What’s your tshirt size?” etc. 4️⃣ Secret Events — events that are completely hidden from your upcoming events list; only players who receive invites can view and register for the event 5️⃣ Event Filters — tag your events (i.e., beginner/intermediate/advanced; or morning/afternoon/evening; or soccer/volleyball/bingo; or Manhattan/Queens/Brooklyn) and allow players to filter your events by those tags 6️⃣ Create user tags for easy segmented inviting — Segment your players, into for instance, Captains, Students, Managers, Referees, League Leads, etc. 7️⃣ Support for parents registering their kids — Create spots that require a parent and a youth to register 8️⃣ Partial refunds 9️⃣ Support for Apple Pay & Google Pay (in addition to credit & debit cards) 🔟 Membership tools like the ability to only invite membership holders to certain events, or invite membership holders a few days before opening the event up to everybody else.
Was this helpful?